Search This Blog

Tuesday, February 7, 2012

Multigrain Bread

I was a very lucky girl growing up. My Mom was an amazing cook and my Dad made amazing bread. There was always an abundance of good food at my house. I realize as I get older that  I took for granted my Mom's cooking and my Dad's bread baking. 

I can remember as a kid getting so excited to go out, to eat fast food, or for the junky white bread. It was (what I thought) a treat for us but now I love home made meals and home baked bread far more than restaurant or store bought. Well sometimes I like restaurants because I don't have to clean or do dishes.

Recently I have been trying to bake more and more. Also, I have been trying to do whole grains. I came across a multigrain bread recipe that I thought was genius because it used hot cereal as the base which is great so I don't have to go and buy and deal with each of the grains. I have tweaked the original recipe into something I love. The bread is delicious. Earthy and full of goodness! Bake some and you'll feel healthier for it but then you might add a ton of butter on it and feel a little less healthy.
Multi-Grain Bread
adapted from Cook's Country

*I use weight measurements in most of my baking for more precise weight. You can pick up a scale at most stores and your baking will thank you.

180 grams Nine Grain Hot Cereal
544 grams Boiling Water
1 packet Rapid Rise Yeast
100 grams Honey
4 tablespoons Unsalted Butter, Melted and Cooled
450 grams Whole Wheat Flour
170 grams All-Purpose Flour
50 grams Gluten Flour
20 grams Salt

Place cereal mix in bowl of stand mixer fitted with dough hook and pour boiling water over it; let stand, stirring occasionally, until mixture cools to 100 degrees and resembles thick porridge, about 1 hour.
Once grain mixture has cooled, add honey, butter, yeast, and salt and mix 1 1/2-2 minutes; cover bowl tightly with plastic wrap and let dough rest for 20 minutes.  Knead on medium-low speed until dough clears sides of bowl, 3-4 minutes (if it does not clear sides, add 2-3 tablespoons additional all-purpose flour and knead until it does.  Don’t add more!) continue to knead dough for 5 more minutes.  Place dough in large, lightly greased bowl; cover tightly with plastic and let rise at room temperature until nearly doubled in size, 45-60 minutes.
Grease two 9×5 inch loaf pans.  Transfer dough to lightly floured counter and divide in half.  Press 1 piece of dough into 9×6 inch rectangle, with short side facing you.  Roll dough toward you into firm cylinder, keeping roll taut by tucking it under itself as you go.  Turn loaf seam side up and pinch it closed.  Repeat with second piece of dough.  Spray loaves lightly with water or vegetable oil spray.  Roll each loaf in oats to coat evenly and place seam side down in prepared pans, pressing gently into corners.  Cover loaves loosely with greased plastic and let rise at room temperature until nearly doubled in size 30-40 minutes.  Dough should barely spring back when poked with knuckle.
Thirty minutes before baking, adjust oven rack to middle position and heat oven to 375 degrees.  Bake until loaves register 200 degrees, 35-40 minutes.  Transfer pans to wire rack and let cool for 5 minutes.  Remove loaves from pans, return to rack, and let cool to room temperature, about 2 hours, before slicing and serving.
Storage: Bread can be wrapped in double layer of plastic wrap and stored at room temperature for up to 3 days.  Wrapped with additional layer of foil, bread can be frozen for up to a month.

Saturday, February 4, 2012

Morning Buns

For me there are some treats that I can justify because they have fiber or protein. If that is what you are looking for turnaround and find a different recipe because these are not it.

If you are looking for a delicious, flaky, calorie-laden pastry then you have found the right recipe.

I got this from Cook's Country and as it does take some preplanning and work the night before it is worth every minute. We had them for breakfast one Saturday morning and they were so good that I immediately went to work and the gym and handed them out so I wouldn't personally eat all of them. 

They were well received and well be making random appearance at our breakfast table. I am even thinking about different fillings but the orange-cinnamon combination here is spot on.


Morning Buns
adapted from Cook's Country
  • 3 cups all-purpose flour
  • 1 tablespoon sugar
  • 1 envelope (2 1/4 teaspoons) instant or rapid-rise yeast
  • 3/4 teaspoon salt
  • 24 tablespoons unsalted butter, cut into 1/4-inch-thick slices and chilled
  • 1 cup sour cream, chilled
  • 1/4 cup orange juice (see note), chilled
  • 3 tablespoons ice water
  • 1 large egg yolk
FILLING
  • 1/2 cup granulated sugar
  • 1/2 cup packed light brown sugar
  • 1 tablespoon grated orange zest
  • 2 teaspoons ground cinnamon
  • 1 teaspoon vanilla extract
Instructions
  • 1. MAKE DOUGH Combine flour, sugar, yeast, and salt in large zipper-lock bag. Add butter to bag, seal, and shake to coat. Press air out of bag and reseal. -Following photo 2 (top left), roll over bag several times with rolling pin, shaking bag after each roll, until butter is pressed into large flakes. Transfer -mixture to large bowl and stir in sour cream, orange juice, water, and egg yolk until combined.
  • 2. ROLL DOUGH Turn dough onto floured surface and knead briefly to form smooth, cohesive ball. Roll dough into 20 by 12-inch rectangle. Starting at short edge, roll dough into tight cylinder. Pat cylinder flat to 12 by 4-inch rectangle and transfer to parchment-lined rimmed baking sheet. Cover with plastic wrap and freeze for 15 minutes.
  • 3. FILL AND SHAPE Line 12-cup muffin tin with foil liners and grease liners with cooking spray. Combine granulated sugar, brown sugar, orange zest, cinnamon, and vanilla in medium bowl. Remove dough from freezer and place on lightly floured surface. Roll dough into 20 by 12-inch rectangle and sprinkle evenly with filling, leaving ½-inch border around edges. Starting at long edge, roll dough into tight cylinder and pinch lightly to seal seam. Trim ½ inch dough from each end and discard. Cut cylinder into 12 pieces and transfer, cut side up, to prepared muffin cups. Cover loosely with plastic and refrigerate at least 4 hours or up to 24 hours.
  • 4. LET RISE AND BAKE  Adjust oven rack to middle position and heat oven to 200 degrees. When oven reaches 200 degrees, turn it off. Remove buns from refrigerator and discard plastic. Place buns in turned-off oven until puffed and -doubled in size, 20 to 30 minutes. Remove buns from oven and heat oven to 425 degrees. Bake until buns begin to rise, about 5 minutes, then reduce oven temper-ature to 325 degrees. Bake until deep golden brown, 40 to 50 minutes. Cool buns in tin 5 minutes, then transfer to wire rack and discard liners. Serve warm.
  • MAKE AHEAD: Transfer filled muffin tin to freezer until buns are firm, about 30 minutes. Transfer buns (with liners) to zipper-lock bag and freeze for up to 1 month. To finish, return buns to muffin tin and refrigerate for at least 8 hours or up to 24 hours. Proceed with step 4.

Use Foil Liners

BAKER'S BEST FRIEND
Foil liners prevent our Morning Buns from sticking to the tin. Equally important is removing the buns from both the tin and the liners five minutes after they come out of the oven—otherwise they’ll be greasy.


Thursday, February 2, 2012

Carmelitas

Ever find a dessert that you can't stop making? That is what keeps happening with these carmelitas. Last week at the gym of all places, a friend asked if I had ever had carmelitas. I told her no and she said that she made some this weekend and they were amazing. I was very intrigued to say the least.

I went home and looked it up online and there were tons of recipes and they all looked delicious. I decided to try this one. It makes an 8x8 pan and I luckily I had everything I needed in my pantry (even though the caramels were from 2 Halloweens ago). 

I had one bite.

I turned around and made another batch. 

Then two days later made another batch and I am probably making them for the Superbowl on Sunday. They are that amazing.


Carmelitas 
adapted slightly from Lulu the Baker
*The recipe says to cool completely before cutting which is great when you want bars but we wanted some and couldn't wait and scooped it in to a bowl and ate it with vanilla ice cream. It was amazing.

32 caramel squares, unwrapped
1/2 cup heavy cream
3/4 cup unsalted butter, melted
3/4 cup brown sugar, packed
1 cup flour
1 cup rolled oats (old fashioned or quick)
1 teaspoon baking soda
1/2 teaspoon salt
1 cup dark chocolate chips

Combine caramels and cream in a small saucepan over low heat. Stir until completely smooth; set aside. In a separate bowl, combine melted butter, brown sugar, flour, oats, and baking soda. Pat half of the oatmeal mixture into the bottom of an 8x8" pan. Bake at 350 degrees for 10 minutes. Remove pan from oven and sprinkle chocolate chips over crust. Pour caramel mixture over chocolate chips. Crumble remaining oatmeal mixture over caramel. Return to oven and bake an additional 15-20 minutes, until the edges are lightly browned. Remove from oven and cool completely before cutting.

**To make a 9x13" version, simply double the amounts.

Friday, January 27, 2012

Homemade Hamburger Buns

When I made the homemade sloppy joes my husband said that the french bread rolls were to chewy so I went on a hunt to find a great bun recipe and I came across this one on A Chow Life. T test it out I made sloppy joes and eagerly waited for the feedback and it was a huge thumbs up from everyone. I've also used it for meatball sandwiches, cold cut sandwiches and breakfast sandwiches. Every time it's delicious. So if you are looking for a good bun, here you go.
Hamburger Buns
1 and 1/2 cups milk
8 Tbs. (1 stick) unsalted butter, cut into 8 pieces
4 and 1/2 tsp. active dry yeast
4 cups all-purpose flour, plus more for dusting
5 Tbs. sugar
1 Tbs. kosher salt
1 egg, beaten with 1 tsp. water
Sesame seeds for sprinkling (optional)
In a small saucepan over medium heat, combine the milk and butter and heat until the butter is melted, about 7 minutes. Remove from the heat and let cool to 105° to 115°F. Add the yeast and stir until the yeast is dissolved. Let stand for 10 minutes. 

In the bowl of a stand mixer fitted with the dough hook, combine the 4 cups flour, the sugar and salt and beat on low speed until combined, about 30 seconds. Add the milk mixture and knead until the dough forms a ball, about 1 minute. Increase the speed to medium-low and knead until the dough is smooth and elastic, 4 to 5 minutes. Remove the dough from the mixer bowl, oil the inside of the bowl and return the dough to the bowl.
Cover tightly with plastic wrap and let the dough rise in a warm place until doubled in volume, about 1 hour. 

Line a baking sheet with parchment paper. On a lightly floured work surface, roll out the dough into a 10-by-7 1/2-inch rectangle. Using a ruler as a guide, cut the dough into 2 1/2-inch squares. Transfer to the prepared baking sheet, spacing the buns evenly apart, and cover tightly with plastic wrap. Let rise in a warm place for 30 minutes.
Preheat an oven to 400°F.
Remove the plastic wrap from the baking sheet. Brush the tops of the buns with the egg mixture and sprinkle with sesame seeds. Bake until the buns are golden and an instant-read thermometer inserted into the center of a bun registers 190°F, 14 to 16 minutes. Transfer the buns to a wire rack and let cool completely. Cut in half and use as hamburger buns. Makes 12 hamburger buns.

,

Tuesday, January 24, 2012

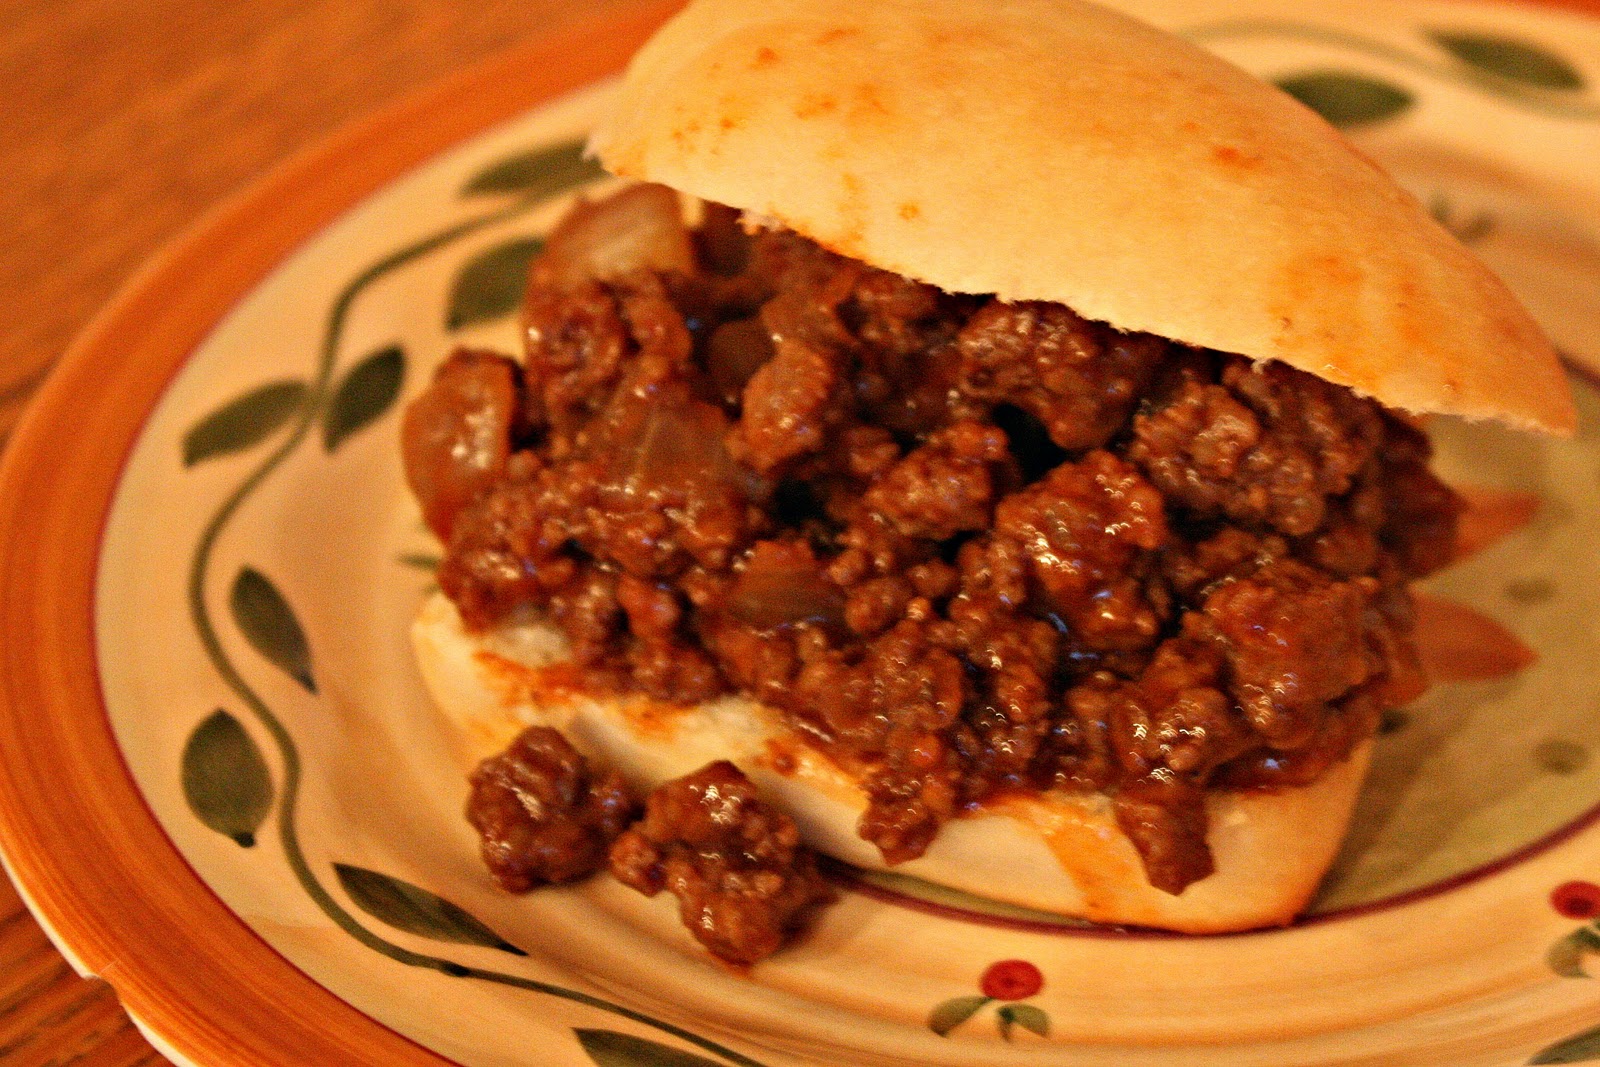
Mmmmm... Sloppy Joes

My husband loves sloppy joes but the only kind I've ever had are the ones where you brown ground beef and add a can of sauce and it heats and you put it on a bun and dinner is served. I am not a fan of this meal. The only nights we had it were the nights that I had dinner plans so I wouldn't have to eat it. Until I decided to go on a hunt for a delicious sloppy joe recipe.

I love the internet. You can type in something as basic as Homemade Sloppy Joes and you get hundreds of websites. Thank you to AllRecipes because I now love sloppy  joes.

I made my own hamburger buns (recipe to follow) and they were delish.  Quick and easy. Plus they were so nice to take as leftovers. It is also a great freezer meal just reheat over med-low heat so it doesn't burn.


Sloppy Joes
adapted from AllRecipes

*The recipe calls for  smoky BBQ sauce but all I had was Sweet Baby Rays so I added a teaspoon of liquid smoke and it was amazing.

2 tablespoons vegetable oil
2 onions, chopped
2 ½ pounds ground beef
2 tablespoons tomato paste
2/3 cup smoky BBQ sauce
½ cup ketchup
¼ cup Worcestershire sauce
¼ cup soy sauce
Freshly ground black pepper
8 to 12 potato rolls

Heat the oil in a large skillet over medium heat. Add the onions and cook, stirring, until they start to turn translucent, about 4 minutes. Add the beef and cook, stirring and breaking up the meat, until it is finely crumbled, the liquid boils off and the meat begins to brown, about 10 minutes. Drain the grease off the meat and onions. Stir in the tomato paste, and keep stirring until the meat is coated. Add the BBQ sauce, ketchup, Worcestershire, soy sauce, and pepper, and bring to a boil. Cook until the sauce is slightly thickened, 4 to 5 minutes. You can make the sloppy joe meat up to 2 days in advance and reheat it over low heat or in the microwave.

Wrap the rolls in aluminum foil and warm in the oven for about 10 minutes. Serve the sloppy joes hot with the warmed rolls.